Webflow Designer: The Complete Technical Guide (2026)
Master the Webflow Designer interface with our comprehensive guide for building visually stunning and high-performing websites without code.


On this page
Introduction to Webflow Designer
The Webflow Designer represents a major shift in how websites are built, offering a visual canvas where design directly translates into production-ready code. Unlike traditional website builders that sacrifice flexibility for simplicity, Webflow's Designer bridges the gap between visual design and web development, giving designers direct control over their implementation without requiring them to write code.
At its core, Webflow Designer enables professionals to build responsive, dynamic websites visually while generating clean HTML, CSS, and JavaScript behind the scenes. This approach eliminates the traditional design-to-development handoff process, reducing miscommunication and accelerating project timelines.
This guide explores the technical aspects of Webflow Designer, from understanding its interface to implementing advanced techniques that optimize both design and performance. Whether you're a designer looking to gain more control over your web projects or a developer seeking a more visual workflow, mastering Webflow Designer opens up new possibilities for web creation.
If you'd rather bring in outside help than learn the tool yourself, we have a guide on how to choose a Webflow developer that walks through what to look for, what questions to ask, and how to vet candidates before you hire.
Understanding the Interface
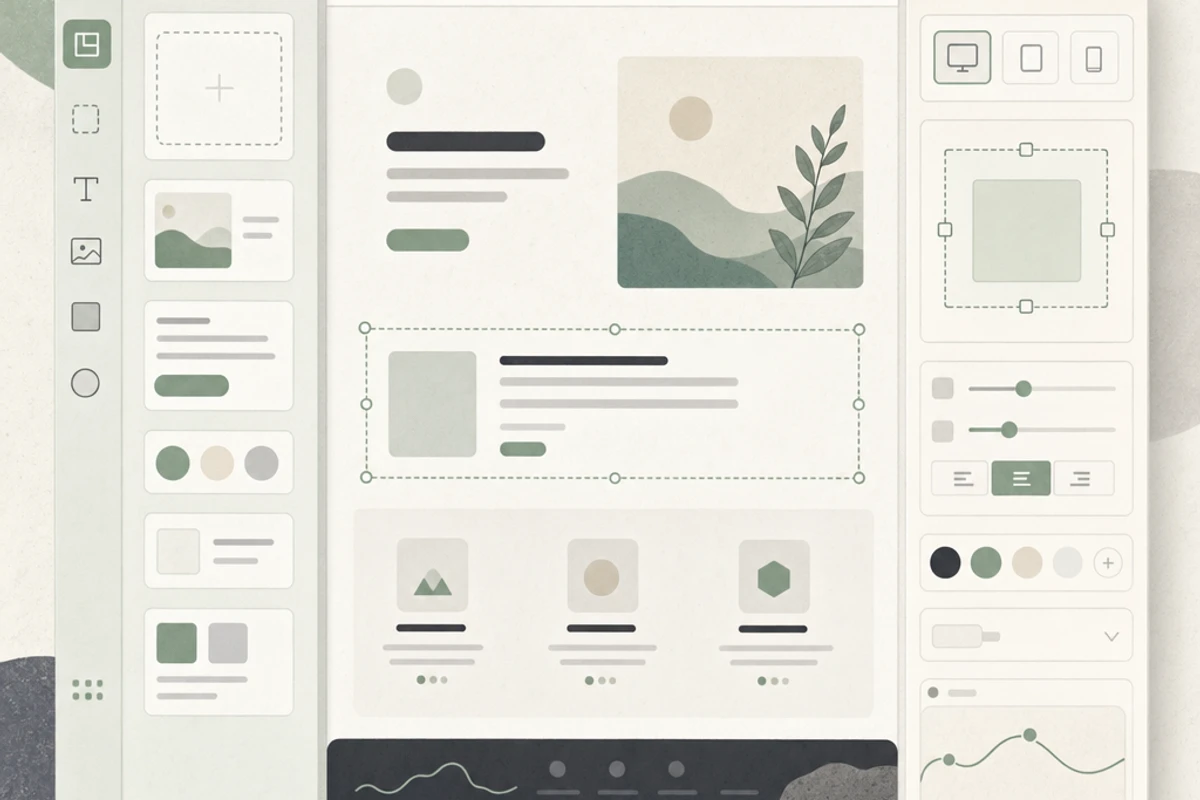
Webflow's Designer interface is sophisticated yet intuitive, organized into distinct panels that each serve specific functions in the website creation process:
The Left Panel: Elements and Structure
The left panel contains the Elements panel and Navigator. The Elements panel houses all the building blocks you'll use to construct your site, from basic HTML elements like divs, links, and paragraphs to more complex components like sliders and tabs. The Navigator provides a hierarchical view of your page structure, allowing you to select, organize, and manage nested elements with precision.
The Center Canvas
The central workspace is your visual canvas where you'll build and interact with your design. This area functions like a professional design tool but represents actual HTML elements rather than static mockups. What you see here directly translates to the live website, providing a true WYSIWYG (What You See Is What You Get) experience.
The Right Panel: Style and Settings
The right panel is where most of your technical customization happens. The Style panel exposes CSS properties in a visual interface, allowing fine-grained control over typography, spacing, positioning, and more. The Settings panel controls element-specific options, from link destinations to form configurations.
The Top Bar: Global Controls
The top bar contains project-wide settings, publishing controls, responsive mode toggles, and access to the CMS, Ecommerce, and Logic tools. This area also houses the preview function, allowing you to test your site's functionality before publishing.
The interface is designed to scale with your expertise—beginners can start with basic layouts and gradually access more advanced features as they grow comfortable with the platform.
Working with Elements & Components
Elements are the fundamental building blocks in Webflow Designer, each representing an HTML element with its associated properties and behaviors.
Basic Elements and Their Technical Purpose
Understanding the technical purpose of each element helps create semantically correct websites:
- Div Block: The workhorse container element (creates a div) for layout structuring
- Section: Creates a semantic section element, ideal for major page segments
- Container: A centered div with a max-width, following responsive design best practices
- Heading/Paragraph: Semantic text elements (h1-h6, p) crucial for accessibility and SEO
- Link/Button: Interactive elements that handle navigation and user actions
- Image: Optimized picture element with responsive sizing capabilities
The Component System
Webflow's component system revolves around Symbols and Classes, which create reusable patterns throughout your site:
Classes function similarly to CSS classes, allowing you to create style definitions that can be applied to multiple elements. The class system supports inheritance, enabling cascading style patterns that maintain consistency while allowing for variations.
Symbols are reusable component groups that can be placed across multiple pages. When you update a Symbol, those changes propagate to all instances across your site. Symbols can contain nested Symbols and accept unique content through configurable properties called Symbol Overrides.
Combos are class combinations that can be saved and reapplied as a group, streamlining your styling workflow.
The component system in Webflow is particularly powerful because it maintains the balance between consistency and flexibility, allowing global updates while accommodating page-specific customizations.
Mastering Responsive Design
Webflow Designer takes a breakpoint-based approach to responsive design, allowing you to create layouts that adapt seamlessly across device sizes.
The Breakpoint System
Webflow uses a desktop-first approach with several default breakpoints:
- Desktop (1920px and above)
- Tablet Landscape (991px)
- Tablet Portrait (767px)
- Mobile Landscape (479px)
- Mobile Portrait (smaller screens)
You can customize these breakpoints or add your own to match specific device requirements. Each breakpoint creates a new context where you can apply different styles to the same elements.
Technical Approaches to Responsive Layouts
When building responsive designs in Webflow, several layout techniques prove particularly effective:
- Flexbox: Using display: flex for one-dimensional layouts that need to redistribute space dynamically
- Grid: Implementing display: grid for two-dimensional layouts that maintain proportional relationships
- Max-width constraints: Setting maximum widths rather than fixed widths to allow content to adjust to available space
- Responsive images: Using percentage-based sizing and Webflow's automatic image optimization
- Custom visibility: Showing or hiding elements at different breakpoints for optimized user experiences
For complex responsive behaviors, you can use Webflow's conditional visibility features to show different content based on screen size, creating truly device-optimized experiences without duplicate content issues.
Creating Animations & Interactions
The Interactions panel in Webflow Designer provides a visual way to create complex animations and user interactions without writing JavaScript.
Types of Interactions
Webflow supports two main categories of interactions:
Page Triggers fire when specific page events occur:
- Page Load: Animations that play when the page first loads
- Page Scroll: Effects that respond to scrolling position
- Mouse Movement: Interactions that follow cursor position
Element Triggers respond to user interaction with specific elements:
- Click/Tap: Animations triggered by user clicks
- Hover: Effects that activate when users hover over elements
- Mouse Enter/Leave: More specific hover-state controls
- Focus/Blur: Accessibility-friendly interactions for form fields
Technical Animation Properties
Webflow's animation system provides granular control over:
- Easing functions: Control how animations accelerate and decelerate
- Transform properties: Move, scale, rotate, and skew elements in 2D or 3D space
- Opacity and color: Create fade effects or color transitions
- Timing and delays: Orchestrate complex multi-element animations
For performance optimization, Webflow prioritizes GPU-accelerated properties like transform and opacity, which render more efficiently than properties that trigger layout recalculation.
Advanced Interaction Techniques
More sophisticated interactive experiences can be created with:
- Multi-step animations: Create sequential animation timelines
- Scroll-based triggers: Tie animation progress to scroll position
- State-based interactions: Create different states for components (like tabs or accordions)
- Mouse movement tracking: Create parallax effects or cursor-following elements
While Webflow's visual interaction tools cover most use cases, you can extend functionality with custom code for more specialized behaviors.
Style Systems & Global Settings
Establishing a robust styling system in Webflow Designer is crucial for maintaining consistency and enabling efficient updates across your project.
Understanding Style Hierarchy
Webflow's styling system follows a specific cascade:
- Global styles: Set project-wide defaults for typography, colors, etc.
- Base element styles: Default styles for HTML elements like headings and paragraphs
- Classes: Custom style definitions applied to specific elements
- Combo classes: Additional classes that modify base classes
- Breakpoint-specific styles: Responsive overrides for different screen sizes
Color Systems and Typography
Global swatches allow you to define a consistent color palette that can be updated from a single location. When you change a global swatch, all elements using that color update automatically.
Similarly, the typography system lets you create global text styles that define font family, size, weight, line height, and other typographic properties. These can be applied consistently across your site and updated globally when needed.
Class Naming Conventions
Adopting a structured naming convention for your classes improves project maintainability:
- BEM (Block Element Modifier): A methodology that structures classes into blocks, elements, and modifiers
- Functional naming: Classes named after their purpose rather than appearance
- Namespace prefixing: Using prefixes to indicate the role or scope of classes
Consistent naming helps both you and other team members understand the purpose and relationship of different style elements, especially in larger projects.
Performance Optimization
Creating visually impressive designs is only part of successful web design. Ensuring your Webflow site loads quickly and runs smoothly is equally important for user experience and search engine rankings.
Image and Asset Optimization
Images often account for the majority of a website's file size. Webflow provides several built-in optimization features:
- Automatic responsive image generation
- Format conversion options
- Quality adjustment settings
For more advanced image optimization, you can use our Heavy Asset Finder to identify oversized images across your entire site. This tool scans your published Webflow site and provides actionable insights on which images need resizing or further compression.
Code Efficiency Best Practices
While Webflow generates code automatically, your design decisions directly impact code efficiency:
- Reuse components: Utilize Symbols and classes to reduce redundant code
- Simplify complex structures: Avoid unnecessarily deep nesting of elements
- Clean up unused styles: Remove classes and Symbols that aren't being used
- Optimize interactions: Use transform and opacity for animations rather than properties that trigger layout recalculations
Our Website Optimizer can help you identify performance bottlenecks and provide specific recommendations for your Webflow site.
Advanced Loading Strategies
To further enhance performance, implement these loading techniques:
- Lazy loading: Use the native loading="lazy" attribute for images below the fold
- Asset organization: Group related assets into folders for better caching
- Custom code optimization: Minify any custom JavaScript or CSS
- Font optimization: Limit font variations and consider system fonts for non-heading text
Regular performance testing using tools like Lighthouse or PageSpeed Insights helps ensure your optimizations are effective and identifies new opportunities for improvement.
Designer-Developer Workflow
While Webflow Designer bridges the gap between design and development, many projects still involve collaboration between specialized designers and developers.
Effective Collaboration in Webflow
Webflow's team collaboration features facilitate smooth workflows:
- Team workspaces: Shared project access with role-based permissions
- Editor access: Allow content managers to update site content without affecting design
- Read-only sharing: Share designs for feedback without allowing changes
- Versioning: Track changes and restore previous versions if needed
Developer Handoff and Custom Code Integration
When developers need to extend Webflow's capabilities with custom code:
- Embed elements: Insert custom HTML directly into the page
- Custom code in page settings: Add page-specific JavaScript or CSS
- Project-wide code insertion: Implement site-wide scripts or styles
- API integration: Connect with external services using Webflow's API capabilities
For complex projects requiring custom functionality, create clear documentation of where and how custom code integrates with the Webflow-generated elements.
Export Options for Developers
Webflow offers several ways to export your work for further development:
- Code export: Download the generated HTML, CSS, and JavaScript
- Asset export: Extract images and other media files
- Headless CMS: Use Webflow as a content backend with custom frontends
These export options provide flexibility when Webflow needs to integrate with larger development ecosystems or custom deployment pipelines.
Advanced Techniques
Once you've mastered the fundamentals of Webflow Designer, these advanced techniques can help you create more sophisticated and powerful websites.
Conditional Logic and Dynamic Content
Webflow's logic features allow you to create conditional experiences:
- User-specific content: Show different content based on user attributes or login status
- Form logic: Create multi-step forms with conditional fields
- Membership areas: Build protected content sections for subscribers or specific user groups
For monitoring form performance on your site, our Form Health Monitor tool can help identify and fix issues with your forms to ensure consistent lead generation.
Custom Code Solutions
Extend Webflow's native capabilities with strategic custom code:
- Third-party API integration: Connect with external services and data sources
- Advanced animations: Implement libraries like GSAP for complex motion design
- Custom interactions: Create specialized behaviors beyond Webflow's built-in options
- Analytics enhancements: Implement detailed event tracking or custom reporting
Advanced CMS Techniques
Leverage Webflow's CMS for more dynamic site structures:
- Multi-reference fields: Create complex relationships between content types
- Dynamic pages: Generate pages automatically from CMS data
- Filter and search functionality: Enable users to find specific content
- Localization: Structure content for multiple languages or regions
These advanced CMS implementations can transform a static website into a powerful, data-driven application.
Conclusion
The Webflow Designer represents a significant evolution in web development, providing a visual interface that generates professional-quality code. By mastering its capabilities, designers can take greater ownership of their implementations, while developers can work more efficiently with a visual canvas that doesn't sacrifice code quality.
The most successful Webflow projects leverage both the visual design tools and a solid understanding of web fundamentals. This balanced approach leads to websites that are not only visually impressive but also technically sound, with clean code, optimal performance, and thoughtful user experiences.
As you continue your journey with Webflow Designer, remember that performance optimization should be an ongoing concern. Tools like our Website Optimizer and Heavy Asset Finder can help you maintain peak performance as your site grows and evolves.
Whether you're a designer expanding your technical skills, a developer streamlining your workflow, or a team looking to improve collaboration, Webflow Designer offers powerful tools to bring your web projects to life with greater efficiency and creative control.
For those considering different platforms, comparing Webflow vs WordPress or Webflow vs Wix can help you make an informed decision based on your specific project needs.